Voice demos don’t just show clients how well we interpret copy. They can also be our audio calling cards. Like images, Mp3 files can hold metadata, extra details we can add to let clients know who and what they are listening to. So, isn’t it crazy that voice talents don’t routinely add any ID3 tags to the Mp3 voiceover demos they provide to prospective clients? We’re also missing a great opportunity to brand our voice demos (and ramp up the cool factor) by not adding album cover art to our audio files. I’m going to show you how to easily fix that and why you’d want to. Everything you do here will travel with your audio file wherever it’s downloaded and played. But, nothing is set in stone. Adding ID3 tags is non-destructive to the audio file. And you can follow the same steps to change any details at any time.
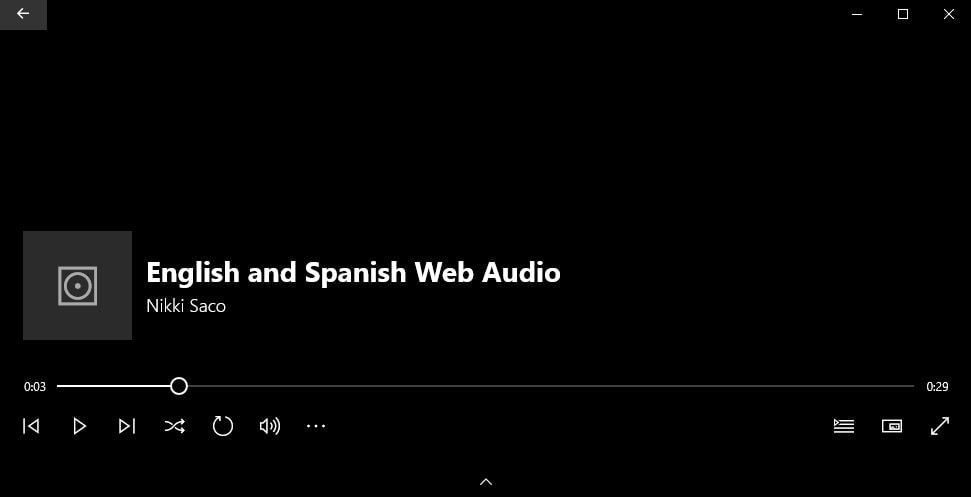
During playback of our voice demos on Windows Groove, for example, clients see this:
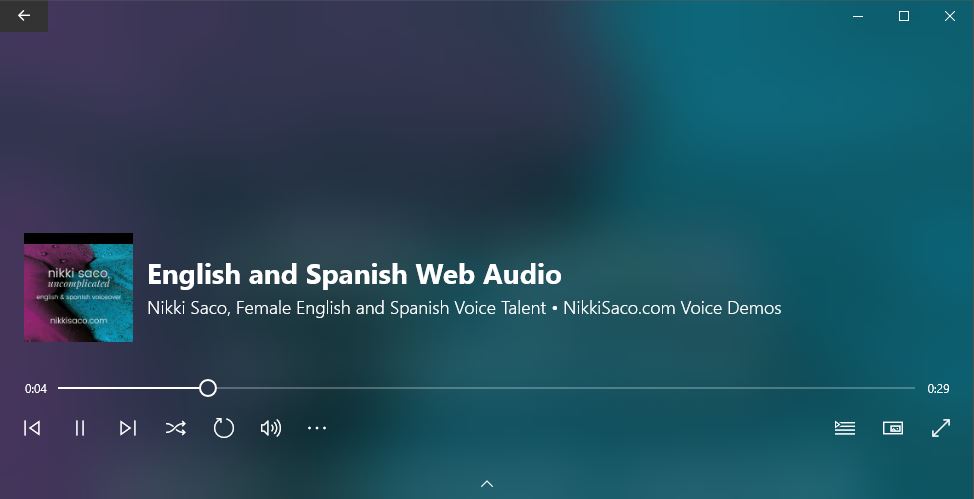
Using iTunes in Windows or Mac, you can add details so that when they play your voice demo, they’ll see this:
Are you thinking “Meh”? Consider the fact that search engines will pick up most of the metadata in the ID3 container, and that different players will feature the album art and details a little differently, But, you’ll definitely go from a simple placeholder image, filename and non-searchable Mp3 to a branded image, rich details (including your website URL, and Mp3s that Google has a better chance of finding and indexing.
There are a number of ways to add ID3 tags to your Mp3 files. Windows file explorer and Mac Finder windows both allow you to right-click the files and add details. But, I don’t see a way to add album art through the file managers. So, let’s use iTunes for all the metadata entry. See, iTunes is still good for something. First, we’ll add our voiceover demos to the library. Go to File > Add to Library, or click Ctrl-O on Windows, probably Command-O on Mac (not sure since I’m typing this on a PC right now).
Batch Add the Common Metadata to the Mp3 Audio Files
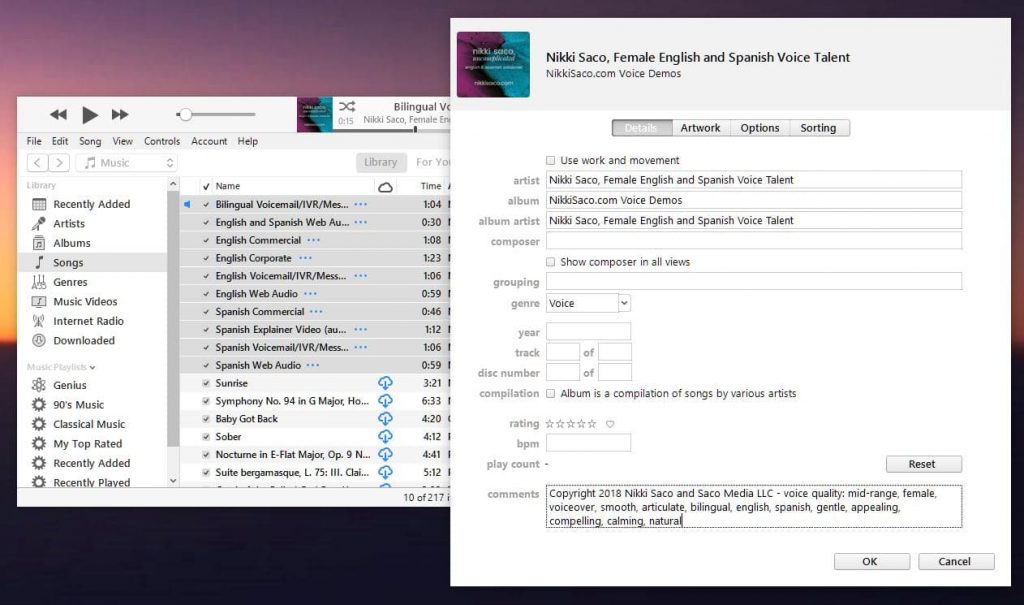
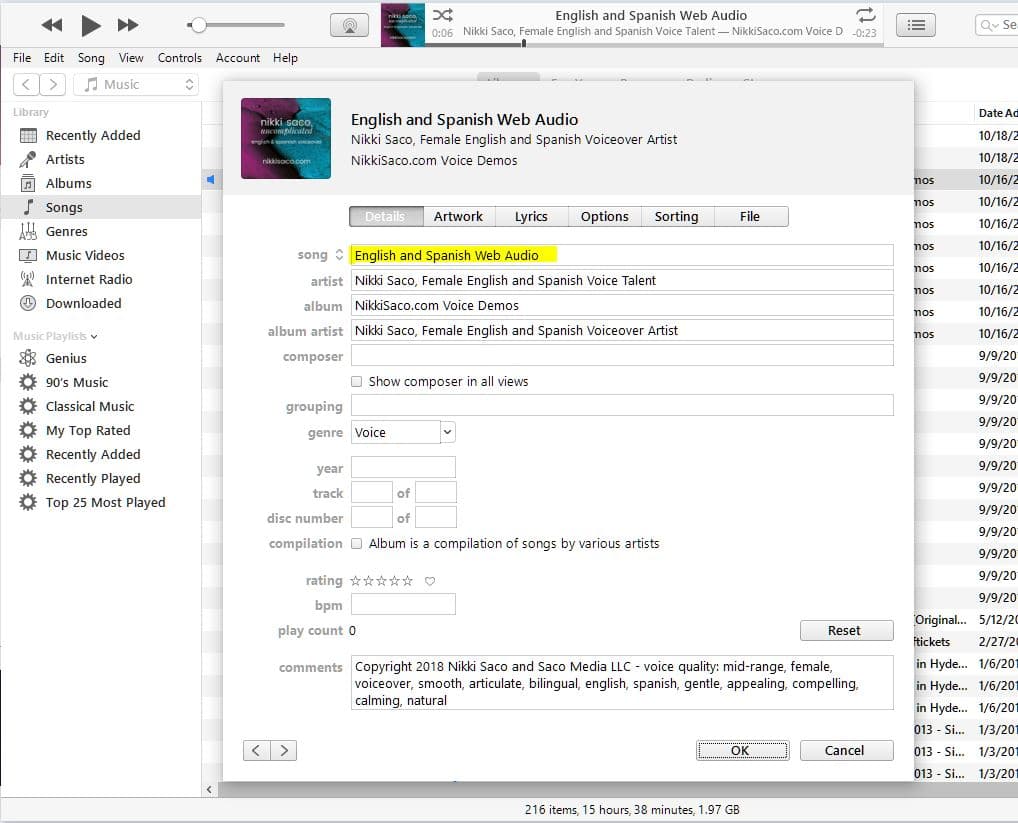
Did I just geek out with that sub-heading or what? Don’t run for the hills yet. What I mean is let’s go ahead and add all the common details first so that we don’t have to keep typing the same stuff into a bunch of files. (1) Select all the demo files, (2) right-click and select Get Info. A popup will ask you “Are you sure you want to edit information for multiple items?” (3) Click Edit Items. Next, (4) enter all the common text in the pre-selected Details tab. You’ll want to include your business name, maybe a tagline, definitely your copyright, website URL, and some voice characteristics in the comments. I wouldn’t add a phone number or email since there’s no way to mask that from bots in the ID3 container, but the content is all up to you. When you’re done (5) click OK:
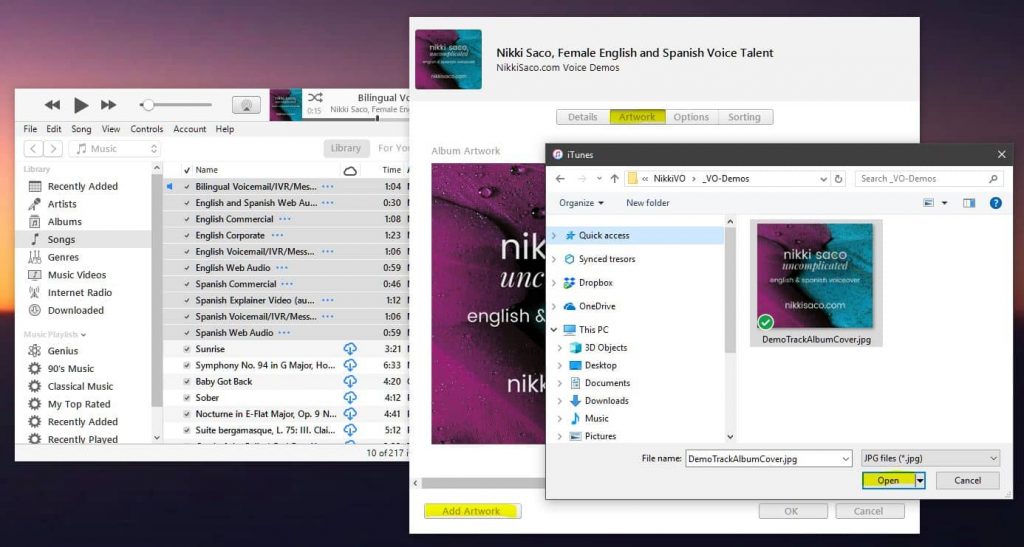
Now we’re ready to add the album art. Do you see the Artwork tab at the top? (6) Click that. Then, (7) click Add Artwork. (8) Select your album cover art and (9) click Open so that iTunes sees it. Satisfied? (10) Click OK.
Are you done? Um, no. Did you notice that you can’t add a song title when you batch enter ID3 tag details? That’s because iTunes suspects/hopes you added different songs. You could leave it blank, but then your filename will be the default song title. And that’s not always pretty or informative. So, let’s add song titles. You’ll have to do this one file at a time. (11) Right-click each file one by one and select Song info. Now you can add the title of the voiceover demo. Remember that this is what Mp3 players will list on playback. (12) Type in the song title and (13) click OK.
Wow, 13 steps. I thought it would help to count them out, but maybe I just made it a little intimidating. On the plus side, it is mid-October and 13 totally fits the Halloween spirit. So, what’s next?
What to Use for Your Album Art
The artwork definitely needs to be square, otherwise essential information may be cut off by most players. The two essentials on your cover art are your brand and some contact information, usually your website domain. But, since this is an image, you can probably add your email or phone, just remember that it may not be very big on some players. Your brand is more than your logo. It’s the whole package that represents what is unique and quirky about you. Sure, your logo might ideally accomplish that, but you may also want a tagline, colors that represent you and that you hopefully have on your website. There should be some continuity between your album art and your website.
Featuring Your Newly Tagged Demos on Your Website
Once you have your new metadata embedded in your Mp3 voiceover demo files, you’ll want to upload them to your website if that’s how you make your audio files available. If you’re using WordPress, you’re in luck. With each version update, WordPress keeps making it easier to add media files. Just drag your demos right into your media library. In a page or post, you can click Add Media and select one or more files. Wordpress will automatically embed a single player or playlist depending on how many files you selected. Unfortunately, you’ll get the plain black player, but a web designer should be able to style your player for you. The players and playlists I use on this site are all WordPress generated. In a future post, I’ll share styling details which you can use if you’re know something about web design and can edit CSS files. You can also contact me for help. Or you can use a trusted Mp3 player plugin which will likely detect your new album art and metadata.
Something You Can Do Now
Before writing this post, I wanted to make sure this isn’t something voice talents already know about and do. What I found was that, not only aren’t top voice talents using any ID3 tags let alone album art, in several cases, the demo filenames didn’t even identify the artist. Several just used “commercial.mp3.” Seriously. A producer listening to demos a few days after she downloaded them wouldn’t be able to identify the talent whose voice she loved and wants to hire. We need to make it easier for people to reach us when they’re ready, not harder. So, my first recommendation is to update your demo filenames and at least include your domain name in the URL: “TypeofDemo-MyDomain-com.mp3” or even “TypeofDemo-MyDomain.com.mp3.” Macs and PCs recognize only the last three letters of the filename as the file extension. So, it’s OK to have another period in the filename. And, while you’ve got the demo listed in a Windows file manager or Mac Finder, go ahead and right-click on the file and add some more details.
So what are you waiting for? Don’t be another “unknown” during playback. Take your voiceover demos to the next level and make sure producers know who they’re listing to and how to find you every time they click the play button on one of your voice demos.


